10 Tips for Choosing the Best Hinged Shower Screen?
Choosing a Hinged Shower Screen is not only a style decision. It affects safety, cleaning, ventilation, and daily comfort. Houzz’s 2024 U.S. Bathroom Trends Study reports continued investment in upgraded shower areas and more spacious layouts. That trend makes glass selection and door movement increasingly important. The wrong hinge position can strike a vanity, block a walkway, or leave water on the floor.
Market reports from Grand View Research also indicate steady growth in the global shower enclosure sector. Buyers now expect cleaner lines, durable hardware, and easier maintenance. However, attractive photographs rarely show wall movement, uneven tiles, or limited bathroom clearance. Real installations can be less forgiving. Measure the opening carefully. Check the swing radius. Inspect the wall structure before ordering.
Bathroom designer Philippe Starck once said, “The bathroom is the most intimate room in the house.” His observation explains why small details matter here. A Hinged Shower Screen should feel stable when opened and quiet when closed. Look for safety glass, corrosion-resistant hinges, reliable seals, and compatibility with local installation standards, such as EN 14428 or ANSI Z97.1 where applicable. These standards support better decisions, but they cannot replace professional site assessment.
This guide examines ten practical selection points, from glass thickness to hinge direction. Some recommendations will suit compact bathrooms. Others may fail in humid, heavily used spaces. That is worth admitting. No checklist predicts every imperfect wall or careless splash. Good judgment still matters.
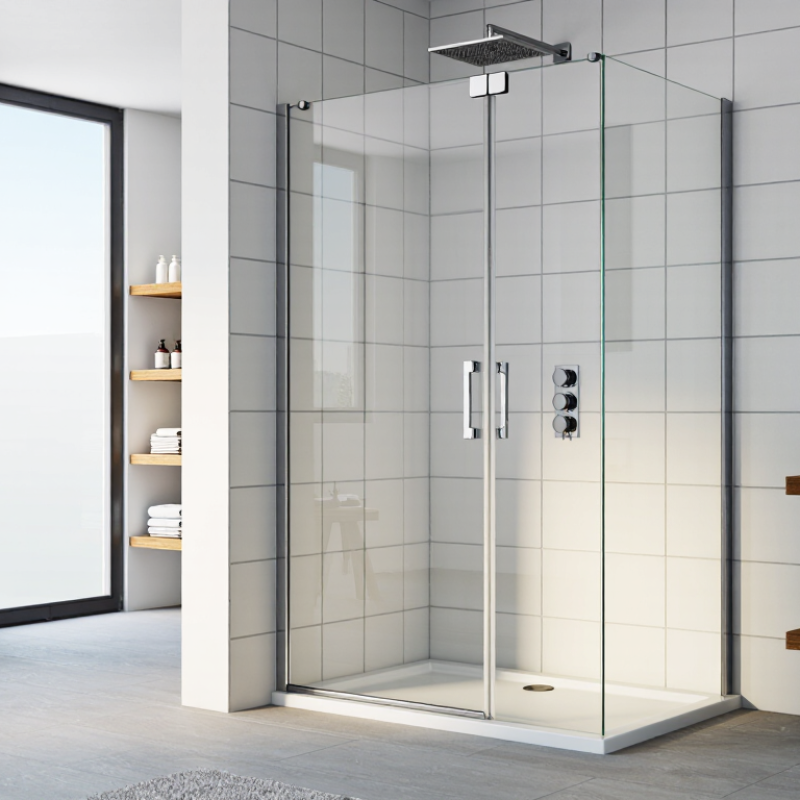
Define Your Bathroom Layout and Shower Space
Before selecting a hinged shower screen, map the bathroom’s usable space, not just its floor area. Measure the shower opening at the top, middle, and bottom; older walls are rarely perfectly straight. Mark the proposed door swing with masking tape. Does it hit a vanity, towel rail, or toilet? Leave clear standing room outside the enclosure, too. A screen that fits on paper can feel awkward when someone is reaching for a towel.
Houzz’s 2024 U.S. Bathroom Trends Study reported a median spend of $15,000 on major bathroom remodels. That figure is a useful reminder: layout mistakes can become expensive once tiles and plumbing are in place. Measure twice. Check the drain position, shower controls, and any window ledge before choosing the hinge side. For a narrow room, compare the door’s full arc with a sliding or fixed-panel option; hinged doors need unobstructed clearance. Also check whether the floor slopes toward the drain and whether the screen can seal against the wall. Small detail. Ask an installer to confirm wall plumb, fixing points, and opening clearance on site. I have seen neat plans miss a protruding handle; it is an easy detail to overlook, and worth checking again.
Compare Glass Types, Thicknesses, and Safety Features
When choosing a hinged shower screen, compare the glass before judging the frame. Clear tempered glass is widely used; if it breaks, it usually crumbles into smaller pieces, though injuries are still possible. Laminated glass can retain fragments between its layers, but it is heavier and needs compatible hinges. Check the product’s safety markings, not just a seller’s description.
The U.S. Consumer Product Safety Commission’s 16 CFR Part 1201 includes a 400 ft-lb impact test for Category II glazing. That is a useful benchmark, but certification requirements can vary by location.
Thickness affects feel, weight, and hinge demands. Six-millimetre glass is lighter, while 8 mm often feels more rigid; 10 mm adds weight and may require stronger hardware.
Thicker is not automatically safer if the hinges, wall fixings, or door width are poorly matched. Ask for the permitted door size and hinge load, then inspect the glass edges and cut-outs for chips or rough finishing. I would double-check those details in person; product pages can make every screen look sturdier than it feels.
Select the Right Hinge Style and Door Opening Direction
A hinged shower screen should open smoothly without striking a vanity, towel rail, or toilet. Wall-mounted hinges are a common choice for framed or frameless glass, but their clearance depends on the hinge position and door width. Pivot hinges can suit wider openings, though they may need more precise alignment. Ask the installer how much load the hinges support and whether the glass thickness matches their specifications. Small details matter.
Choose the opening direction by standing where you will enter the shower. An outward-opening door can make stepping out easier, but it needs clear floor space beyond the screen. An inward-opening door may fit a tight bathroom, yet check that it does not hit the shower fittings or trap water against the seals. Some designs swing both ways; confirm the hinge and seal arrangement is made for that movement. Measure twice.
Mark the door’s full swing with painter’s tape before ordering. Include nearby handles and drawers, not just the wall. A door that clears an empty room may catch a laundry basket on an ordinary morning. Also consider which hand will reach the handle naturally, especially if the shower entrance is narrow. I have found that plans can look roomy on paper and feel awkward in use, so test the route with the door’s swing in mind.
10 Tips for Choosing the Best Hinged Shower Screen
Door width is an important starting point when selecting a hinge style and opening direction. A wider door requires more swing clearance, so confirm that it can open outward without contacting a vanity, toilet, wall, or towel rail. Always check local safety requirements and the installation instructions for the selected screen.
Evaluate Seals, Hardware Quality, and Water Protection
A hinged shower screen is only as dependable as its seals and installation. Check the bottom sweep for continuous contact with the tray, and inspect the hinge-side gasket for gaps near the pivot. A thin strip of daylight can become a wet patch outside the shower. Look for flexible, replaceable seals rather than brittle edges that may split after repeated opening. Small detail. Also test the door gently: it should swing without scraping, sagging, or pulling the seal away from the wall.
Hardware needs to suit the door’s weight and daily use. Hinges should feel firm, with no loose movement, and fixings should resist corrosion in a damp room. Ask whether the glass thickness and hinge capacity are compatible; a heavy door on undersized fittings can drift out of alignment. For water protection, check that the screen overlaps the shower tray and that any deflector directs spray inward. The U.S. Department of Energy notes that standard showerheads can use up to 2.5 gallons per minute. That figure describes flow, not screen leakage, but it shows why a small gap can matter during a long shower. A U.S. EPA WaterSense-labeled showerhead uses no more than 2.0 gallons per minute. Don’t treat a tighter seal as a substitute for careful installation. Even a well-chosen screen may need adjustment after the first few weeks.
Check Installation Needs, Cleaning, Warranty, and Overall Value
A hinged shower screen should fit your bathroom, not merely look elegant online. Houzz’s 2024 U.S. Bathroom Trends Study reported that 33% of renovating homeowners enlarged their showers. That change affects door swing, entry clearance, and waterproofing.
Tip 1: Measure the opening at three heights. Walls are rarely perfectly straight. Tip 2: Check the door arc against toilets, vanities, and towel rails. Tip 3: Confirm the wall can support the hinges. Tip 4: Ask whether professional installation includes sealing and alignment. A small error can leave water on the floor. I once underestimated hinge clearance; the door opened beautifully, but blocked the bathroom drawer.
Cleaning should influence the glass and hardware choice. Tip 5: Choose smooth, accessible surfaces with fewer exposed crevices. Tip 6: Confirm the recommended cleaner before installation. Abrasive products may damage finishes. Tip 7: Plan a quick squeegee routine after each shower. The U.S. Environmental Protection Agency identifies moisture control as important for reducing indoor mold risk. This screen does not prevent mold alone. Ventilation still matters.
Tip 8: Read the warranty for glass, hinges, seals, labor, and exclusions. Tip 9: Verify replacement-part availability in writing. Tip 10: Compare total ownership cost, not only purchase price. The National Association of Home Builders’ 2024 Cost of Doing Business Study highlights how labor and operating costs influence remodeling value. A cheaper screen may require earlier adjustments. Keep the invoice, installation photos, and care instructions. They may become useful later.
 Skip to content